
Dating back to the Ancient Sumerians, crystals have been known to heal, protect, and enhance spirituality. Crystals and pottery have existed alongside for ages, but few artists ever combine the two.
The use of crystals for healing can be traced back to the ancient cultures of China, Egypt, and Greece. Egyptians were on the forefront of using crystals in everyday life, and the surviving, crystal amulets grace art and history museums today with their intricacies and energy. The word “crystal” is derived from ancient Greek, meaning “ice” because the ancients considered crystals to be eternal ice frozen in time. Centuries later, crystals are still meaningful for those looking to tap into the gem’s centuries-old powers.
As someone who is personally fascinated with crystals, I’ve used them to decorate some of my artwork in an effort to enhance the healing and regenerative properties of alter and ceremony pieces.
Making Clay Crystals
There are a variety of ways to make clay crystals. My approach to creating clay crystals is simple and will get you reliable results for crystals used to decorate the surface of your pottery.
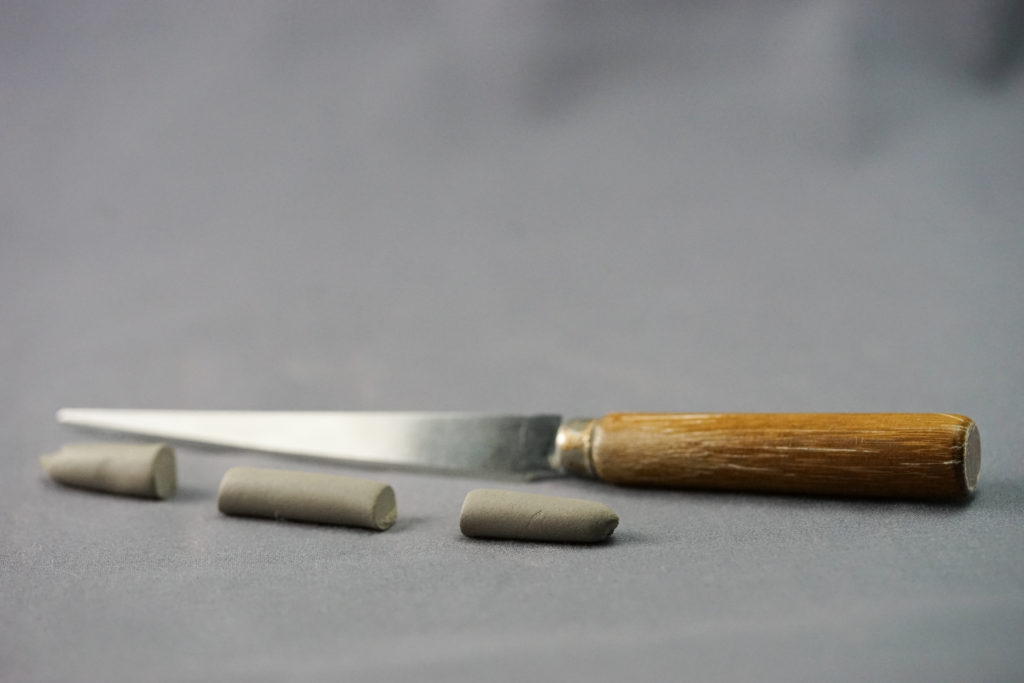
Before we begin there are a few items you’ll need to have handy. A container and paper towels are only necessary if you making your crystals to use for another day. I usually make over 100 crystals in one sitting, and then apply them in the next day or two. Because my process includes drying out the clay coils to create the smoothest and most precise cuts, I find that the final crystals need some added moisture in order for me to apply them to my teapots.
Supplies:
- Clay (recommend same clay used for pottery piece)
- Fettling Knife
- Air-tight container and damp paper towels (if not attaching right away)
Steps to Making Clay Crystals:
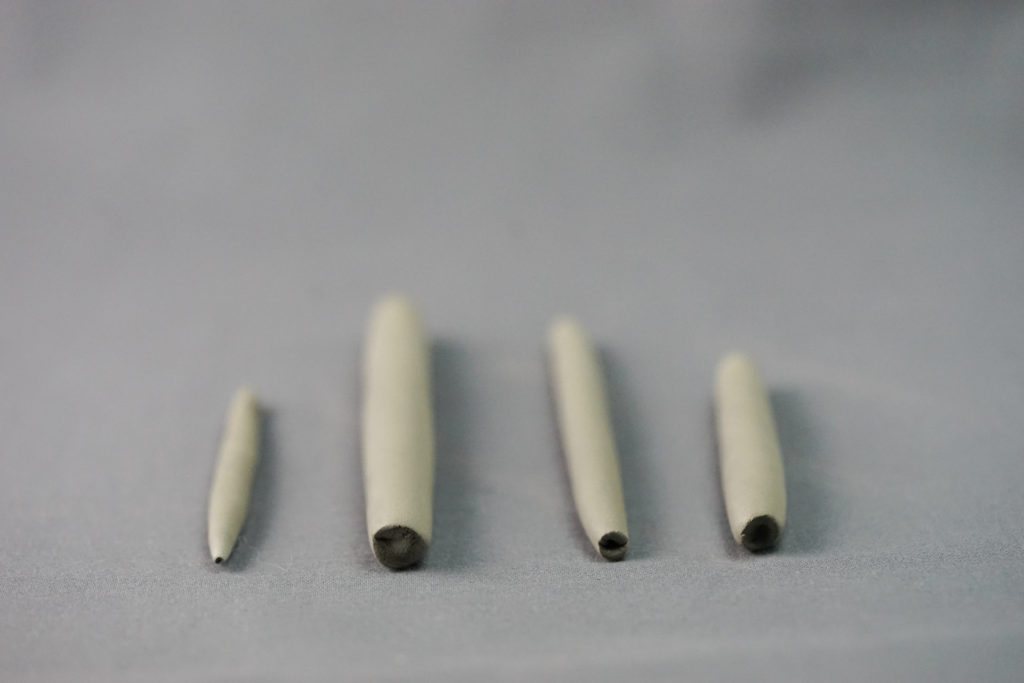
- Start by rolling coils of different thicknesses and laying them straight to dry on a flat surface
- When the coils are close to leather-hard slice them into smaller segments
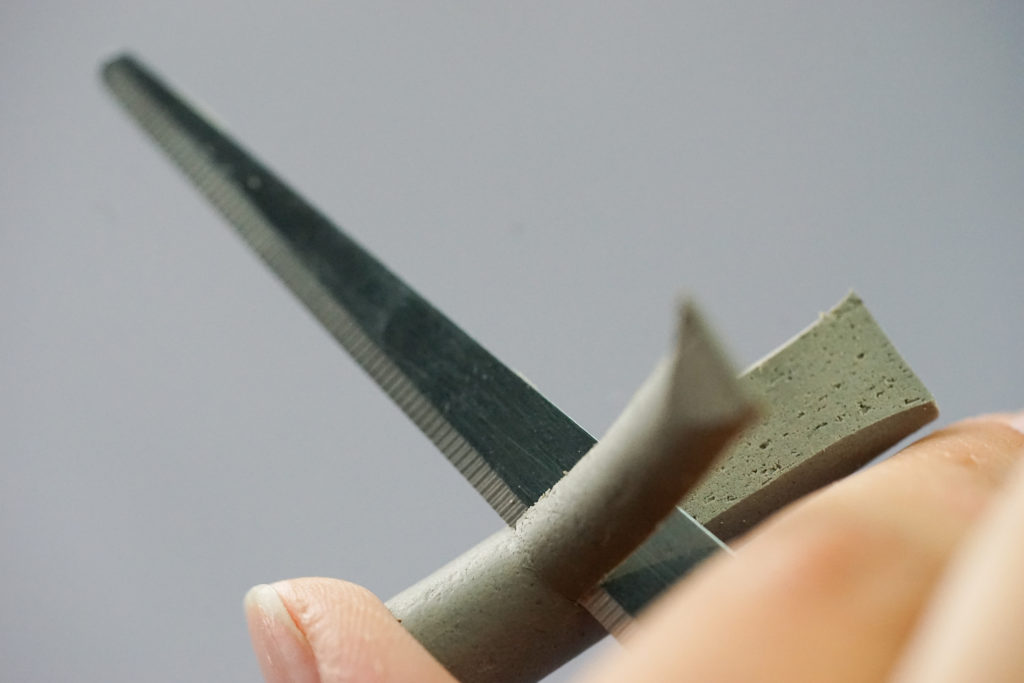
- Take a segment and slice the long edges until you have five, flat sides
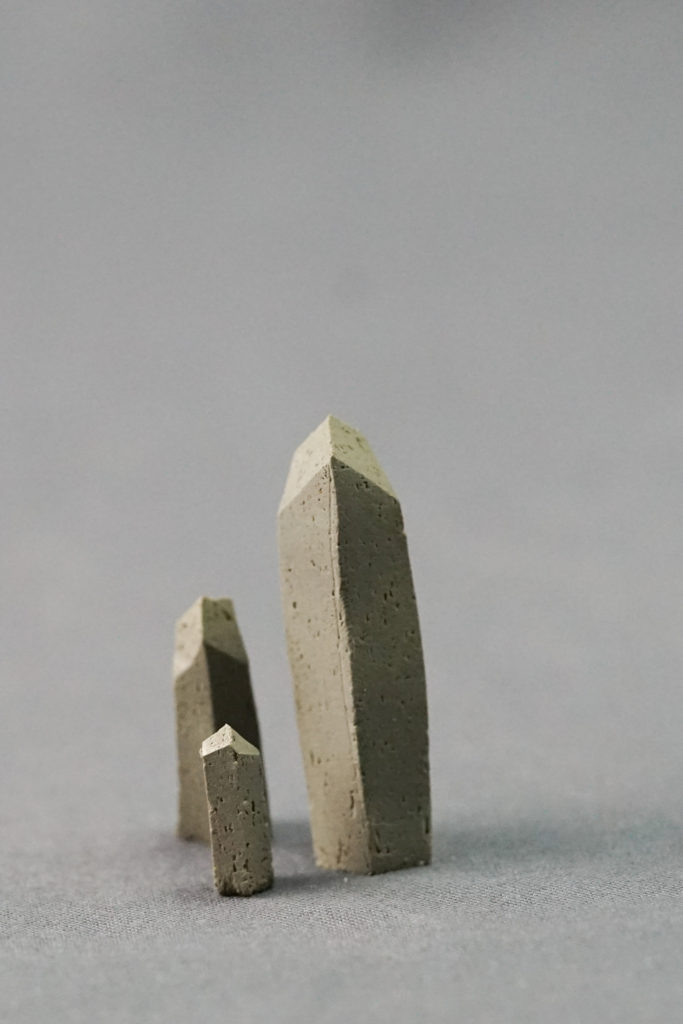
- Slice the top into a triangular peak (usually 3-4 cuts)
- Store in a moist container until use or apply directly to surface
Choose Glaze Colors with Meaning:
Crystals with different colors have different meanings, I feel like the same can be accomplished through your choice of glaze colors. Choose your colors wisely soul traveler.
To see more examples of finished crystals and ideas on how to use them, visit Caroline’s site: www.burntthistleceramics.com and her Instagram account @burntthistleceramics
Good informative post for me.
I added your website into my bookmarks!
P.S.: Excited for future updates!
Best regards,
-John